Thursday, 23 July 2015

Haloumi and Store Cupboard Rice Salad

Living and working in Paris, my flatmate and I are often too hot to eat a hot meal, and really can't afford to eat meat for every meal either. We have however managed to eat healthily with meals like this one, using cheeses such as haloumi and feta as meat substitutes, and making use of nutritious red peppers, onions, peas and olives. I know Andrew sells great quality Greek feta and Cypriot haloumi which per person are such good money for value! His range of different olives are also pretty amazing too, and what's nice you don't have to buy a whole tub like you do in the supermarket.


Ingredients for two people:
Half a pack of haloumi, four to six slices | Half a red onion, finely chopped | Half a red pepper finely chopped | Frozen peas | Drop of olive oil and balsamic | Sprinkle of dried oregano or mixed herbs | Rice, about 1 mug full | Feel free to adapt accordingly for what you need to use up in the fridge

1| Slice your haloumi and drizzle over a little olive oil and sprinkle some dried herbs, massage in and set to one side.  2| Then start to gently fry your onion, and a little crushed garlic if you have it. 
3| Meanwhile add your rice to boiling water and cook for ten minutes. 


4| Add your pepper and olives and cook for a further five minutes. 


5| Add your green peas and a dash of baslsamic vinegar cooking on a high heat now for around two minutes before adding your cooked rice. 


6| Mix and pour into a serving dish so that you can quickly give your frying pan a clean before cooking the haloumi. 


7| Heat up the pan and fry the haloumi for about two minutes each side until it is nice and golden all over. 


7| Serve immediately with the rice and enjoy! 


Friday, 17 July 2015

Chicken and Sweet Roasted Vegetable Salad


I made this up on the spare of the moment with what we had in the fridge for the first meal in our new flat. I live for sweet potato (so healthy and filling), and adding some diced feta means two quality chicken breasts are more than sufficient for 3-4 people. 

Ingredients 
Half a yellow pepper thinly sliced | Half a red onion thinly sliced | One large sweet potato diced | Two high quality chicken breasts diced  | 1/2 - 1/3 a pack of feta diced | Red Leaf Lettuce | Olive Oil and Balsamic Vinegar 

1| Preheat the oven to 180C and prepare the vegetables. 


2| Toss together in an oven dish with a generous drizzle of balsamic vinegar and olive oil and place in the oven for about 30 minutes, checking half way through to check it's not burning. 


3| Meanwhile fry the chicken in a pan, dice the feta and roughly chop the lettuce. 

4| Find a nice big plate or platter and start arranging the salad as follows: lettuce first, roasted vegetables, chicken and then feta, before giving another drizzle of olive oil on top to finish off. Serve with some lovely crusty bread, which you can now also buy in Andrew's baked fresh each day by my mum! 


Thursday, 12 March 2015

Slow Roast Pulled Pork

If you follow my recipes, you've probably worked out by now that I am a massive Jamie fan! Why? He always cook great dishes with really simple non-expensive ingredients but puts flavours together and cooks things in a way that just makes some of the most delicious and comforting meals I've ever eaten. It's all pretty easy and non-complicated too. Mum and I had wanted to try his Pulled Pork recipe for a while, and did so last weekend as I was finally home from Paris for a quick stop. This all meant we had plenty of family members to feed so had the crowd to cook this amount for!
Shoulder pork is much fattier than the traditional leg that most people roast, and although that fat puts some people off, if you cook the meat for long enough, virtually all that fat will completely melt away magically turning into the most delightful flavour and really keeping all the meat super tender and succulent. 


The piece of pork we cooked was about 5kg and we found that it would have easily fed around 20 people- we had lots of lunch for the following week! So we think it would be great for a big family celebration such as Mother's Day (where Jamie cooked kale and beans we did roast potatoes and greens!) or perfect for a big garden party with just buns and salad for people to help themselves. If you do fancy trying this with a smaller piece of pork, say a kilo less, I would knock a couple of hours off of the total cooking time. 

Ingredients 

2 tablespoons fennel seeds crushed | 1 fennel bulb roughly chopped | 1 tablespoon sea salt | 2-3 medium carrots roughly chopped | 2 onions peeled and roughly chopped | 1 bulb garlic cloves smashed | bunch of fresh thyme | 5kg piece of high welfare shoulder pork (ask for a piece left on the bone and scored) | olive oil | a bottle of white wine | 500 ml chicken stock 

1 | Preheat your oven to its maximum temperature. 2 | Place your vegetables in a large baking tray 
3 | Place your piece of pork on top, skin side up, cover in olive oil and massage the fennel seeds and salt into the skin and gaps where it has been scored. 


                             4 | Place in the oven for about 20 minutes until the skin has really started to crisp up. If it looks like the vegetables are starting to burn, add a glass of water. 


                                               5 | Turn the oven down to 120C and cook for 6 hours. 6 | Remove the pork from the oven and add the bottle of wine to the dish. Let this cook away for another hour, occasionally basting the meat with the sauce to let the flavour of the wine soak into the meat and keep it nice and tender. 


                                                       7 | Take the pork from the tray and let it rest for half an hour to an hour covered in lots of foil and a tea towel to keep the heat in. 8 | Meanwhile pour the sauce into a pyrex jug, let settle and remove the fat from the top. Place in a saucepan with the stock and let this cook down into a lovely gravy. 


9 | When it comes to carving the meat, just take your time and remove from the bone. The meat really will fall away, so don't worry, no tricky butchery involved! Maybe break up the crackling first and set to one side then you really can take a fork and just pull away at it. 


I really hope you enjoy this recipe as much as we all did, it was such a pleasure to cook as it was so easy and the smells coming from the oven all day were out of this world! And of course it tasted heavenly! Any questions that I haven't already answered in the instructions send me an email at shop@andrewsqualitybutchers.co.uk

Monday, 24 November 2014

Beef Featherblade Casserole

We're all so busy that sometimes when it comes to cooking all we want to do is to chuck everything in a pan and let it do its thing, and with this recipe you really can, and still be blessed with a delicious meal... But then again it can also be nice to get completely into what you're making and escape from everything else for an hour or two, if you can afford the time.

In France you can't buy stewing steak already cut into pieces, so I bought a delicious kilo of featherblade (paleron in French)- so-called because each slice looks like a feather- and decided to butcher it myself, with a little help from Andrew over facetime! I shall provide tips here for what is quite simple butchery if you have the time and patience; if you perish the thought then just buy a kilo of already diced chuck or featherblade steak and skip to where I put it all together in the casserole dish!


This cut is a lot cheaper in England than in France, about £10.99 a kilo in Andrew's and gives eight good portions, so is amazing value for money. Even better that line of fat, that makes the blade of the "feather", which I cut out and add to the stew, gives the most amazing flavour... with the vegetables, a bay leaf and a few cloves (my magical ingredient in all stews) this dish is quite simply beautiful winter soul food. 

You will need... 
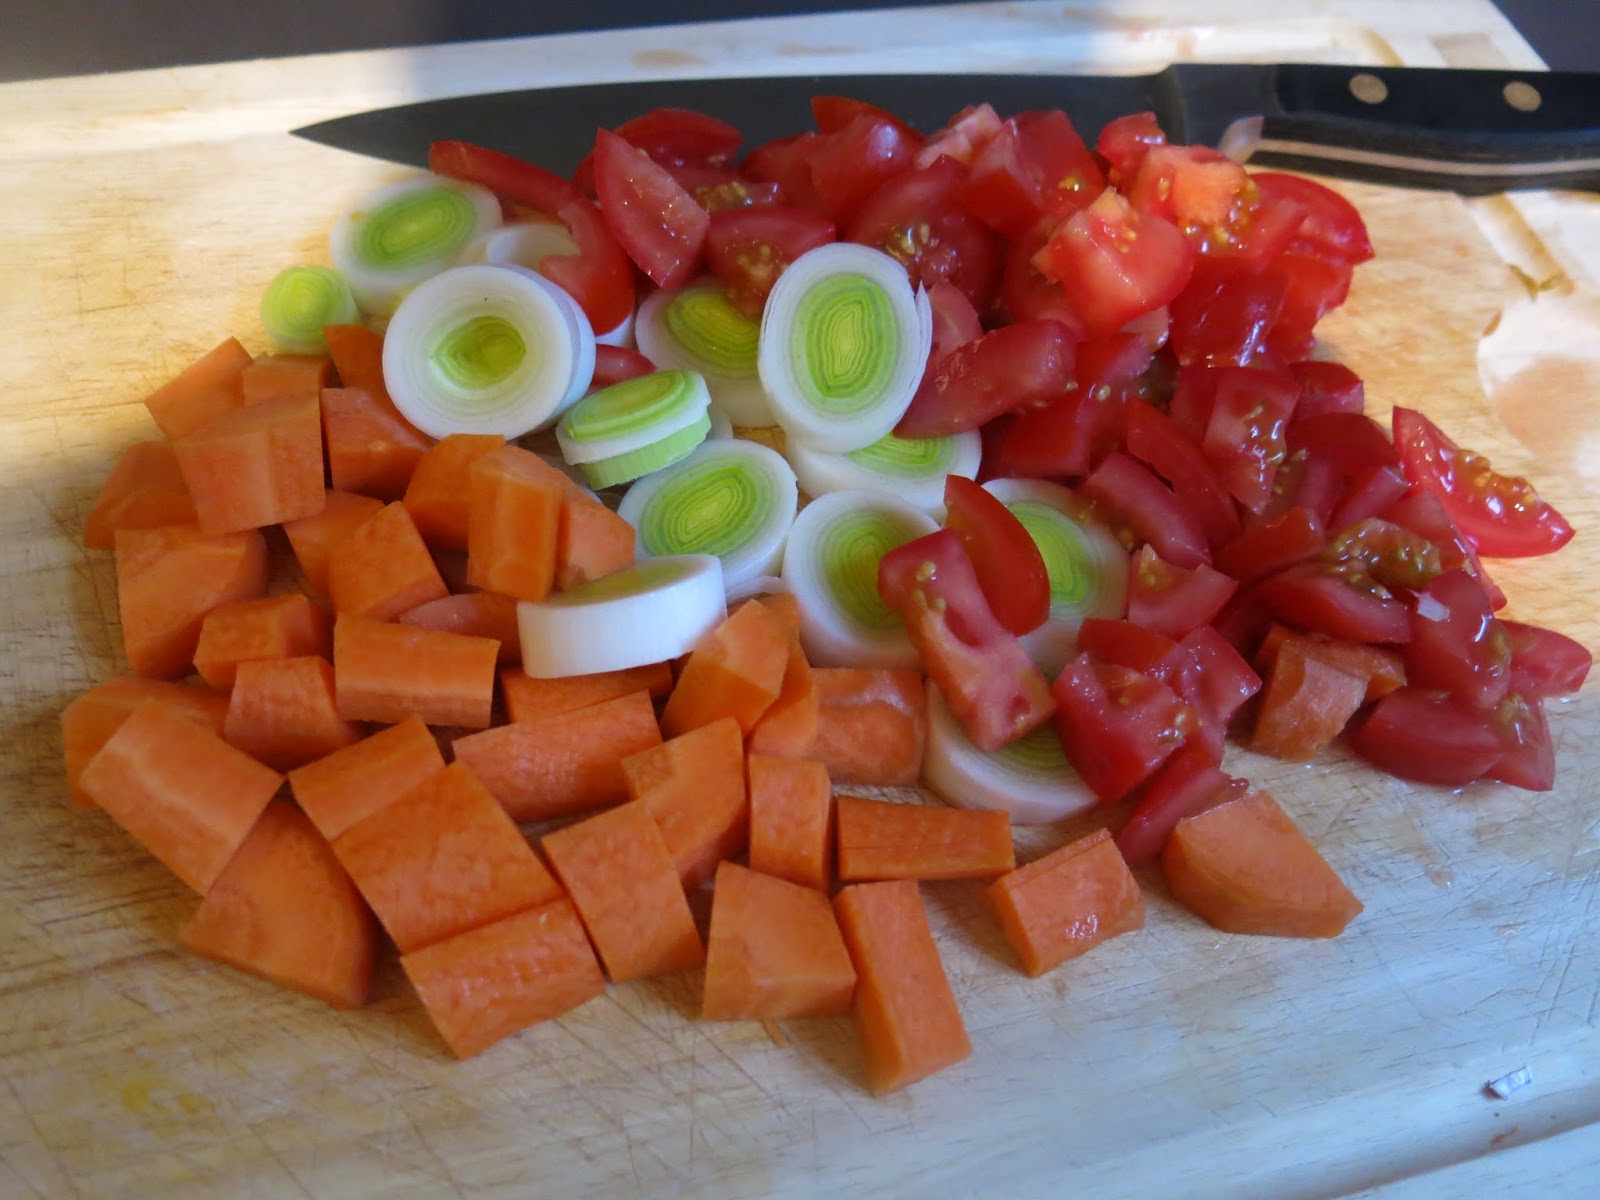
1 kilo featherblade steak in a piece, or diced by your butcher, or 1 kilo any stewing steak from a butchers so you know that it's well matured and full of flavour | 1 clove of garlic | 1 shallot | 1 stick of celery | 1 leek | 1 carrot | 3 tomatoes | 1 litre of chicken or beef stock | 3 cloves | 2 bay leaves


 1  Pre heat the oven to 160C. Chop the shallot, garlic and celery and fry in a large casserole dish on a gentle heat.


 2  Meanwhile chop the carrot, celery and tomatoes and add to the pan.


3  If you're dicing/preparing your own piece of beef, turn off the heat, as it might take a little while. SKIP TO STEP 7 if you're not preparing yourself!

4  Lay your piece of featherblade flat, fat side up. Try gently pulling the fat from one of the corners, gently using the point of a very sharp knife to help lift it slightly. At the point you should see the fat lifting, leaving a thin layer of membrane underneath, this is ok and can be left on- it will disappear when you cook the beef.


So continue running that point of the knife down the line that is made between where the membrane and fat meet, while you are gently pulling the fat away with the two hands.  If you just relax you'll find the two actions helping each other: as opposed to cutting into the meat you are releasing that layer of fat, to enable you to pull it away.


5 Fat removed, we need to take out that feather "blade" which is a sheet/piece of grizzle that runs through the cut. Again patience and using the point of the knife in a gentle manner is key. The action remains the same, although it feels a little more tricky, removing something from inside. So start slow running the point of the knife, down the line of the grizzle so you've got something to hold on to a little.


Once you have that it becomes a little easier to use the knife to help you pull the fat away from the meat as opposed to slicing into the meat and hoping for the best. You want to have as little meat on that fat as possible, you don't want to waste anything.  Just relax and feel your away around. Once you have cut away quite a lot nearest to the edge- the side where my hand is in the picture- you can make a cut down that side of the meat so that you are able to begin to open up the meat. This just makes it easier to see what's going on in there!


It's not the end of the world if you leave more meat on the fat than wanted but have a little look at this next picture to see what you're aiming for!


6 So fat and grizzle placed to one side, and the piece of meat opened up, you can start dicing it.


Cut into two pieces, then cut long strips and just dice across. You don't want pieces too small because the meat is so tender they will just cook down into mush. 


7 Turn the heat back on and add the diced meat to the pan as well as the cloves, bay leaves and stock. Top up with water if the meat isn't covered. Bring to the boil and place in the preheated oven with the lid on.


8 The meat will definitely be cooked after two hours, and if you want to eat at this stage I would mix up about a tablespoon of cornflour (gluten free) in the same amount of melted butter, with a little water added, and stir this into the casserole, bringing the cassserole to the boil on the hob to reduce that sauce down.


9 If you can wait, I would reduce the heat on the oven to 110C and cook for another two hours. You can then remove the two pieces of fat if they haven't completely melted away and also the bay leaves and cloves and then serve with rice or mashed potato. Each time you heat that casserole up during the week it is going to reduce down even more and become even more delicious.


Saturday, 22 November 2014

Steak and Ale Pie


This post isn't a recipe but a celebration, of my mother's gorgeous Steak and Ale Pie which won the diamond cup at this week's prestigious Smithfield Awards, out of a staggering 400 entries. Although she knew that she had won 5 gold awards for some of the other pies and some quiche, it wasn't until the awards ceremony lunch that she was presented with the award by the Guardian's food critic.


I'm so pleased, as I know how hard she has worked for the past year to get that pastry perfect and how she's strived to create something she's proud to say is good as the meat side of the business. She gets up at 5.30am each day to go down to that kitchen and work without a break and until she comes home in the afternoon to do more office work for the business... She's always exhausted when I give her a ring or see her, so for sheer hard work alone this woman really deserves it! Everyone else in the shop are a great support, providing that delicious meat, helping with the washing up, and Kelly and Luke give her a helping hand during the morning... But that cup wouldn't have been won without her!!!


Enough gushing over one of my mother's many talents, here are a few pictures from the event, and her in the kitchen... And if you haven't seen it yet here's a great article on the EADT website with more info and a little video of my dad and Daryl in the shop talking.It's been a crazy week celebrating with Mum even interviewed on BBC Suffolk radio on Friday , so if you're a local get down there to buy one and see what the fuss is all about!

Tuesday, 7 October 2014

Pork Chops with Cashel Blue, Apple and Parma Ham

When I'm lacking inspiration for what to cook I always head to Jamie Oliver's website for new ways to cook "boring" things like pork chops, it really has so many great new ideas. I have always used Parma or Serrano ham to wrap stuffed chicken breast, but never really thought about it wrapping pork chops with anything. This recipe is also good because although all the ingredients feel and taste rather indulgent, a bit of a luxury, you only need a little of each so it doesn't work out too expensive at all.

Ingredients


1 pork chop per person
Three thin slices of apple per pork chop (one small red apple should do most amounts)
About 100g of blue cheese crumbled (Jamie originally uses Stilton but I love Cashel Blue-Andrew sells both)
Two slices of Parma ham (or other good quality prosciutto) per pork chop
One sprig of rosemary per pork chop

First preheat your oven to 200C. Then brown off your pork chops in a pan on a high heat. Cook until golden brown on each side. Leave to one side to cool.


Lay out two slices of Parma ham so that they are slightly overlapping each other and place a pork chop on top in the middle.


Add three slices of apple and a about a tablespoon of blue cheese on top.


Then fold the slices of Parma ham over the top and keep in place by piercing a sprig of rosemary through the parcel. Place in a baking tray and repeat for all other pork chops.


Bake in the oven for ten minutes and serve with anything you like really! As you can see I was too hungry to take any pictures of the finished meal, but I went with green beans and blitzed mash potato. However it would also be great with rice, roast potatoes, or just vegetables.

Thursday, 11 September 2014

Peri Peri Chicken and Patatas Bravas

I made this mix of Portuguese and Spanish cuisine for my friends and parents the night before I go to Paris. With a bit of preparation beforehand and a little bit of effort into dressing up the table its a meal that looks impressive but that is super easy to make. It is also relatively cheap as the chicken I used was leg meat which is super juicy and tender but so much cheaper than the breast!

For starters I also cooked prawns in garlic butter and served a selection of Serrano ham and olives, but that is relatively easy to work out yourself!


Patatas bravas is a potato dish that is part of nearly every Spanish tapas dish: crispy cubed potatoes with a delicious tomato based sauce. I made the sauce from scratch a couple of days before and just left in the fridge, it probably takes 20 minutes max to make.

Just sweat 1/2 finely chopped onion and 4 cloves of crushed garlic in frying pan on a low heat for 3-4 minutes. Then add 1/2 tablespoon of sweet smoked paprika (this is the best paprika with the most flavour), 1 teaspoon of tobasco and 1 tablespoon of Worcestershire sauce. Mix these ingredients and then transfer to a large bowl.


Add 4 tablespoons of tomato ketchup and 2 of mayonnaise. Blend yourself or using a food processor. I have one of those hand processors which is really good. Then season with salt and pepper to taste and and add a drop more tobasco if needed. 


On the actually evening about an hour before you want to eat  just peel and dice enough potatoes for 1 large potato each (use Maris Piper or King Edwards) plus a few extra. Heat the oven to 200C. Place the potatoes in a saucepan of cold water, wash, and the change for fresh water. Bring to the boil, adding salt, and par boil for 6-7 minutes. In the meanwhile heat a baking tray with 1-2 tablespoons of sunflower oil in the oven. Drain the potatoes and leave to one side with the lid on to keep the heat in.
Remove the oiled baking tray out of the oven and being careful spoon the potatoes into the tray and place back in the oven. Watch over every 20 minutes, turning if necessary. They should take 40-50 minutes till they are golden brown and crispy.

Piri Piri Chicken is a portuguese chicken dish that has been made famous by the legendary Nandos and is based on the African bird's eye chilli as the key ingredient. So... my recipe just used normal crushed chilli and didn't taste exactly like Nandos- but for a homemade dish it was so tasty and the chicken was ridiculously tender. All my friends (Nando experts haha) still loved it.

Again I made the sauce a couple of days before and just left in the fridge, leaving little to do on the day/evening. For this you will just need 1/2 chopped red onion, 2 crushed garlic cloves, 1tbsp sweet smoked paprika, juice of one lemon, 2tbsp white wine vinegar, 1 tbsp Worcestershire sauce, a bunch of fresh basil finely chopped, and 1-2 bird's eye chill's (or teaspoon of crushed chilli flakes as you like). Simply mix the ingredients together, add a splash of water and blend again with a hand blender, or food processor. Super easy- sauce made!


Pour the sauce over your chicken legs in a large baking dish, cover with foil and leave to marinate over night in the fridge. I'm really trying to be prepared and let stuff marinate overnight- it really does make such a difference to the flavour!


On the night take out your chicken and brown all over in a frying pan on a high heat. Place back into the baking dish and spoon sauce back on to the chicken covering well. Place in the oven with the potatoes about 40 minutes before the potatoes are due to be done, perhaps lowering the heat to 160-180 towards the last half an hour. Make a big green salad in the meanwhile, tidy up, tidy yourself up and you are ready to entertain, all you need is to take a few things out of the oven and serve!