Showing posts with label Beef. Show all posts

Monday, 24 November 2014

Beef Featherblade Casserole

We're all so busy that sometimes when it comes to cooking all we want to do is to chuck everything in a pan and let it do its thing, and with this recipe you really can, and still be blessed with a delicious meal... But then again it can also be nice to get completely into what you're making and escape from everything else for an hour or two, if you can afford the time.

In France you can't buy stewing steak already cut into pieces, so I bought a delicious kilo of featherblade (paleron in French)- so-called because each slice looks like a feather- and decided to butcher it myself, with a little help from Andrew over facetime! I shall provide tips here for what is quite simple butchery if you have the time and patience; if you perish the thought then just buy a kilo of already diced chuck or featherblade steak and skip to where I put it all together in the casserole dish!


This cut is a lot cheaper in England than in France, about £10.99 a kilo in Andrew's and gives eight good portions, so is amazing value for money. Even better that line of fat, that makes the blade of the "feather", which I cut out and add to the stew, gives the most amazing flavour... with the vegetables, a bay leaf and a few cloves (my magical ingredient in all stews) this dish is quite simply beautiful winter soul food. 

You will need... 
1 kilo featherblade steak in a piece, or diced by your butcher, or 1 kilo any stewing steak from a butchers so you know that it's well matured and full of flavour | 1 clove of garlic | 1 shallot | 1 stick of celery | 1 leek | 1 carrot | 3 tomatoes | 1 litre of chicken or beef stock | 3 cloves | 2 bay leaves


 1  Pre heat the oven to 160C. Chop the shallot, garlic and celery and fry in a large casserole dish on a gentle heat.


 2  Meanwhile chop the carrot, celery and tomatoes and add to the pan.
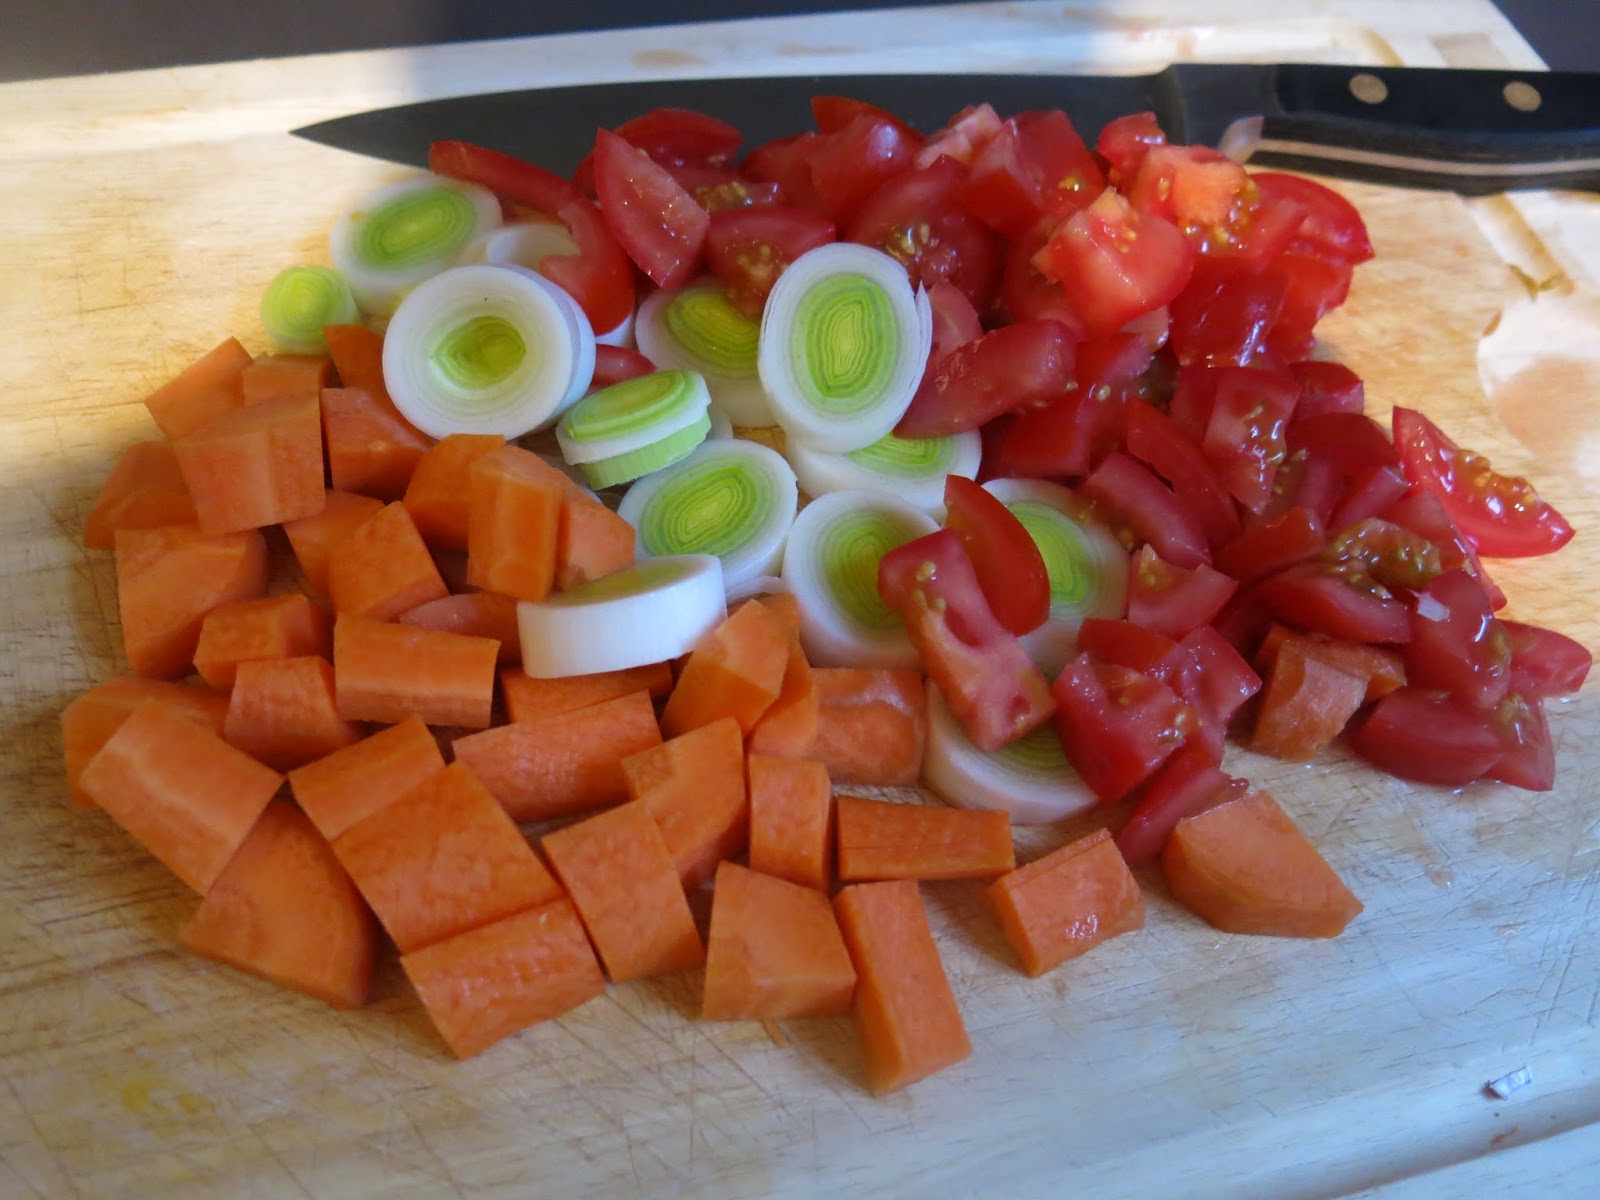


3  If you're dicing/preparing your own piece of beef, turn off the heat, as it might take a little while. SKIP TO STEP 7 if you're not preparing yourself!

4  Lay your piece of featherblade flat, fat side up. Try gently pulling the fat from one of the corners, gently using the point of a very sharp knife to help lift it slightly. At the point you should see the fat lifting, leaving a thin layer of membrane underneath, this is ok and can be left on- it will disappear when you cook the beef.


So continue running that point of the knife down the line that is made between where the membrane and fat meet, while you are gently pulling the fat away with the two hands.  If you just relax you'll find the two actions helping each other: as opposed to cutting into the meat you are releasing that layer of fat, to enable you to pull it away.


5 Fat removed, we need to take out that feather "blade" which is a sheet/piece of grizzle that runs through the cut. Again patience and using the point of the knife in a gentle manner is key. The action remains the same, although it feels a little more tricky, removing something from inside. So start slow running the point of the knife, down the line of the grizzle so you've got something to hold on to a little.


Once you have that it becomes a little easier to use the knife to help you pull the fat away from the meat as opposed to slicing into the meat and hoping for the best. You want to have as little meat on that fat as possible, you don't want to waste anything.  Just relax and feel your away around. Once you have cut away quite a lot nearest to the edge- the side where my hand is in the picture- you can make a cut down that side of the meat so that you are able to begin to open up the meat. This just makes it easier to see what's going on in there!


It's not the end of the world if you leave more meat on the fat than wanted but have a little look at this next picture to see what you're aiming for!


6 So fat and grizzle placed to one side, and the piece of meat opened up, you can start dicing it.


Cut into two pieces, then cut long strips and just dice across. You don't want pieces too small because the meat is so tender they will just cook down into mush. 


7 Turn the heat back on and add the diced meat to the pan as well as the cloves, bay leaves and stock. Top up with water if the meat isn't covered. Bring to the boil and place in the preheated oven with the lid on.


8 The meat will definitely be cooked after two hours, and if you want to eat at this stage I would mix up about a tablespoon of cornflour (gluten free) in the same amount of melted butter, with a little water added, and stir this into the casserole, bringing the cassserole to the boil on the hob to reduce that sauce down.


9 If you can wait, I would reduce the heat on the oven to 110C and cook for another two hours. You can then remove the two pieces of fat if they haven't completely melted away and also the bay leaves and cloves and then serve with rice or mashed potato. Each time you heat that casserole up during the week it is going to reduce down even more and become even more delicious.


Saturday, 14 December 2013

Forerib of Beef with Roasted Potatoes and Carrots

Orders are coming in thick and fast for Christmas in the shop and what has really stood out is how much Forerib of Beef has been ordered this year. It really is a beautiful cut of beef, by far my favourite for roasting, so I thought that as so many of you will be cooking it this year I would show you how I like to cook it, and really how easy it is!


The Forerib has a really distinct flavour because it is left on the bone and has a nice coating of fat around the outside. I know a lot of people shy away from fat, but when it comes to meat, fat and bone really do equal flavour- the more the better. There is also a big difference between a healthy marbling of fat running through the meat and a coating round the outside, and then meat which is completely fatty and grisly. Luckily if you're shopping at a good quality butchers, you will get the former! Because the beef has a distinct flavour, I like to cook my roast potatoes and carrots in the pan so that they can cook in the meat juices for lots and lots of flavour. I then just serve with some fresh green beans so that the meal isn't too heavy.

Roasts are really easy to cook, because you have loads of time to spend on each individual component and don't need to be juggling a million things at once; so there is plenty of time to have a glass of wine and natter with friends in between things coming out and going in. All you have to worry about is your timings for which I work backwards. For example if I know when I want to eat, I know that I have to put the green beans on to boil ten minutes before the end, the carrots in the roasting tin 40 minutes before, and the potatoes in 55 minutes before the end. The gravy can be made at any point and kept warm on the hob. So so simple.

As for how long to cook the beef... For a medium roast- which really is best for beef, no one wants overcooked beef- cook for 20 minutes at 220C to really crisp up the fat on the outside. Then lower your oven to 160C and  cook for 45 minutes for every kilogram it weighs. For example for a 2KG piece,cook for 20 minutes at 220C and for 1 hour 30 minutes at 160C.

After roasting for twenty minutes I place the Forerib on 2 onions halved. This is because I like to cook the potatoes in a good couple of tablespoons of hot oil to get them really crispy... Placing the the beef on the onions just stops the oil running into the meat and making it greasy. Your oil will then be sizzling hot when you want to add your potatoes to the pan, and will really help to crisp them up. If the oil is too cold it will just seep into the potatoes instead of just sealing the outside.


While the oil is heating up and beef is cooking away, you need to peel, chop and par boil your potatoes. For slightly smaller roast potatoes than normal, which I prefer, bring to the boil in cold water. Then boil for 5-6 minutes. Drain away the water and, with the lid on the saucepan, shake well. This will make the potatoes really fluffy and eventually lovely and crispy. Keep the lid on the potatoes until you want to cook them, keeping them as warm as possible. You can also prepare the carrots at this stage. I don't so much par boil the carrots as to just let them sit in boiling water off the heat. This just softens them and helps them to roast all the way through.


When carrots, potatoes and beef are all roasting away nicely (you might want to add some fresh herbs in and around) you can concentrate on your gravy. First and foremost I have to admit I cheat and use Bisto Best (gluten free) as it is the easiest way to make sure you get a nice thick consistency... However  I always make sure I add my own flavours to make it taste that little bit more special.


So in a pan, sweat down some vegetables with flavour. I tend to use whatever is in the fridge, so here I used tomatoes, olives, mushroom and onion. However celery, carrot and garlic all work well. Then add a splash of water and a bigger splash of red wine and whack up the heat to get all those flavours working together. Adding a spoonful of redcurrant jelly or cranberry sauce also makes a big difference if you have any in. At this point make up your bisto gravy in a Pyrex measuring jug- 3 heaped spoons of powder to a pint of water- and add to the gravy. Lower the heat and let it do its thing until the dinner is done when you can just sieve into a gravy jug.

Then have a glass of wine from the bottle you've just opened and relax a bit, maybe giving the potatoes and carrots a little turn around. The final thing to do is to boil some green vegetables ten minutes before the end. You may want to time it that you take the beef out at this stage too and let it rest. Carving the beef is really easy. Just work your knife around the bone- the meat will be so tender that it really will just pull away from the meat. Then place the meat on its side, upwards, and take your time to carve slices onto a plate.

I hope everyone who has ordered Forerib this year really enjoys it! If you have any questions regarding cooking it please do email me lauren_rose1992@hotmail.co.uk and I will be happy to answer.


Tuesday, 1 October 2013

Ben's Beef Lasagne

Lasagne is one of my favourite meals but when it comes to cooking it, I have to admit I am pretty awful. My brother, however, is a dab hand so I thought I would take a few lessons from the man himself before we went back to uni. This meal is such perfect comfort food come summer or winter, and is a dish that is still delicious heated up the next day if you have any leftover... A perfect meal for my blog in my opinion!


Ingredients 

600g beef mince (for your own sake please buy fresh from a good butchers, anything else will leave your lasagne full of water and/or fat) | 1 pack of fresh lasagne sheets | 2 jars of tomato and basil pasta sauce | good handful of frozen sweetcorn (optional) | 1 garlic clove finely chopped | one pot of cheese sauce | cheddar to grate on top (try Andrew's Black Bomber or Mature Farmhouse Cheddar | 

Preheat the oven to 190C | Brown off the mince and chopped garlic in a large shallow frying pan on a high heat. 

If using add the sweetcorn and continue to cook at high heat, until any excess liquid is cooked off and mince is brown not grey. | Add your chosen tomato sauce, heat through and mix thoroughly.


Add a layer of mince to a large ovenproof dish. Cover with a thin layer of cheese sauce.  


Add enough sheets of lasagne to cover the mince and cheese sauce.

Repeat these last few steps... A layer of mince, layer of cheese sauce, pasta sheets... until you have used up all ingredients. On top of the final sheets of lasagne add the last bit of cheese sauce and grate cheddar over the top to cover.

Bake in the oven for 30- 35 minutes until golden brown on top. Serve with bread and oils and a salad.


Monday, 16 September 2013

Mum's Sirloin Steak With Sautéed Potatoes

Whenever there's a special occasion in our house a request is always put in by someone for mum's steak and sautéed potatoes. It is simple, easy to make, delicious, value for money... the list goes on. And as you can buy both exceptionally good steak, and potatoes, from Suffolk I thought I would make it my third meal of eating local produce for September.

I've watched my Dad spend years tracking down the perfect beef supplier for him- from Aberdeen Angus in Scotland to Smithfield meat market in London- and although it has all been good it has been hard to find the perfect combination of beef that is well looked after, of a great eating quality, and from a herd big enough to be able to supply that consistently throughout the year. It turned out that the best beef was on our doorstep all along: our supplier Charlie sources the very best beef from Suffolk farmers that believe well looked after animals make the best beef. Once at Andrew's the beef is matured in carcass for at least 21 days before steaks and joints are cut and prepared daily making it even more delicious!

Ingredients
sirloin steak each (rump steak would be a very good cheaper alternative) | suffolk maris piper potatoes peeled and diced (a big handful per person) | sunflower oil (enough to shallow fry the potatoes in a wok) | green salad to serve

1. From cold water bring potatoes to the boil and simmer for five minutes, strain and set aside | 2. Heat a generous amount of sunflower oil in a wok, enough to just cover all your potatoes | 3. Add potatoes and cook for about 20 minutes until golden, turning now and again to stop them burning on the bottom |

4. Prepare your salad and set aside | 5. Prepare your steaks- anything from a light seasoning and drizzle of olive oil to rubbing in herbs and chilli powder, it's up to you! |


6. Heat a frying pan on a high heat and cook your steaks- I like my steak quite rare but for medium rare I would suggest 2-3 minutes each side for an average sized steak! | 6. With a slotted spoon remove the cooked potatoes to a serving bowl lined with kitchen roll to soak up the fat, then remove the kitchen roll before serving.

Sunday, 9 June 2013

Customer Collaborations: Gill's Beef Wellington

This week one of our good customers, Gill, sent me pictures of this delicious Beef Wellington she made for a dinner party using Andrew's beef fillet and prosciutto ham. All Andrew's beef comes from local farms in Suffolk and Norfolk that adhere to high welfare practices to produce the best quality beef; once it is at the shop, our team hangs it for a minimum of 21 todays until it is deliciously tender. So while buying fillet beef is expensive, buying it from a good butcher assures you won't be let down on the night and makes the meal just as special as if you were in a high class restaurant...


This meal seems simple and easy to cook but looks incredible; it is definitely one I want to try! The original recipe, shown below, comes from Gordon Ramsay for BBC GoodFood.

Beef Wellington
Ready in 1hr50min-2hrs. (inc. aprx. 50 mins chilling)
Serves 6

3 tbsp olive oil
250 g chestnut mushrooms
50 g butter
1 large sprig of fresh thyme
100 ml dry white wine
12 slices prosciutto
500g pack puff pastry, thawed if frozen
a little flour for dusting
2 egg yolks beaten with 1 tsp water 

  1. Heat oven to 220C/fan 200C/gas 7. Sit the 1kg beef fillet on a roasting tray, brush with 1 tbsp olive oil and season with pepper, then roast for 15 mins for medium-rare or 20 mins for medium. When the beef is cooked to your liking, remove from the oven to cool, then chill in the fridge for about 20 mins.
  2. While the beef is cooling, chop 250g chestnut (and wild, if you like) mushrooms as finely as possible so they have the texture of coarse breadcrumbs. You can use a food processor to do this, but make sure you pulse-chop the mushrooms so they don't become a slurry.
  3. Heat 2 tbsp of the olive oil and 50g butter in a large pan and fry the mushrooms on a medium heat, with 1 large sprig fresh thyme, for about 10 mins stirring often, until you have a softened mixture. Season the mushroom mixture, pour over 100ml dry white wineand cook for about 10 mins until all the wine has been absorbed. The mixture should hold its shape when stirred. Remove the mushroom duxelle from the pan to cool and discard the thyme.
  4. Overlap two pieces of cling film over a large chopping board. Lay 12 slices prosciutto on the cling film, slightly overlapping, in a double row. Spread half the duxelles over the prosciutto, then sit the fillet on it and spread the remaining duxelles over. Use the cling film's edges to draw the prosciutto around the fillet, then roll it into a sausage shape, twisting the ends of cling film to tighten it as you go. Chill the fillet while you roll out the pastry.
  5. Dust your work surface with a little flour. Roll out a third of the 500g pack of puff pastry to a 18 x 30cm strip and place on a non-stick baking sheet. Roll out the remainder of the 500g pack of puff pastry to about 28 x 36cm. Unravel the fillet from the cling film and sit it in the centre of the smaller strip of pastry. Beat the 2 egg yolks with 1 tsp water and brush the pastry's edges, and the top and sides of the wrapped fillet. Using a rolling pin, carefully lift and drape the larger piece of pastry over the fillet, pressing well into the sides. Trim the joins to about a 4cm rim. Seal the rim with the edge of a fork or spoon handle. Glaze all over with more egg yolk and, using the back of a knife, mark the beef Wellington with long diagonal lines taking care not to cut into the pastry. Chill for at least 30 mins and up to 24 hrs.
  6. Heat oven to 200C/fan 180C/gas 6. Brush the Wellington with a little more egg yolk and cook until golden and crisp - 20-25 mins for medium-rare beef, 30 mins for medium. Allow to stand for 10 mins before serving in thick slices.


It is fantastic to see the delicious meals our customers are cooking with the meat we sell. If you have a recipe that you think other customers would like to cook (no matter how simple or extravagant), send it to me along with some photos at lauren_rose1992@hotmail.co.uk and I'll do my best to share it in another post!