Thursday, 9 January 2014

Toad In the Hole: Suffolk Sausages in Yorkshire Pudding

This January my Instagram and Facebook feeds have been bombarded with pictures of fridges filled with salad, fruits and vegetables. Don't get me wrong, out of any one in the family, I eat the most green foods, often having a salad in place of their traditional Sunday fry-up... But carrot sticks alone are not going to get me through the winter! As the most depressing month of the year, I want to be eating glorious comfort food, that doesn't hurt my purse.

This recipe for Toad In The Hole is lovely eaten by itself but also nice with green beans, mash and gravy. For the Yorkshire pudding, I turn to Delia, who's recipe I will insert below; for the sausages, of course I turn to Andrew's! I've tried the supermarket ones that are made using artificial skins and they're just not the same, with either no flavour or too much fat. AND for this week only, all Andrew's sausages are 10% off! 


Heat your oven to 220C, then add a dish with sausages and a splash of cooking oil to the oven.

Now make the batter for your Yorkshire pudding. You will need:
75g plain flour - 1 egg - 75ml milk - 55ml water - salt and pepper to season 
Such a small amount (very cheap!) will make enough for four people, so just double and split between two dishes if you would like to make for a larger amount. 

Delia then says: "Make up the batter by sifting the flour into a bowl and making a well in the centre. Break the egg into it and beat, gradually incorporating the flour, and then beat in the milk, water and seasoning (an electric hand whisk will do this in seconds.)" 

The time it takes to do this will have left about 10 minutes for the sausages to start cooking and the pan to get really hot. The heat really is the secret behind a well risen Yorkshire pudding. The batter needs to start sizzling the minute it hits the pan. 

Once you've poured the batter over the sausages leave for 35 minutes until well browned and risen. Serve with gravy for a no nonsense cheap meal or with a few extra vegetables if you're feeling too guilty! 

For more about how Andrew's sausages are made, and another easy sausage recipe click here

Wednesday, 25 December 2013

Christmas Dinner

Happy Christmas everyone! I'm sure none of you will be reading this on Christmas Day but hope you all enjoyed your meat and had a lovely time with friends and family. I was lucky enough to have two special Christmas dinners, one with friends at Lola's gorgeous Suffolk cottage which included a delicious St.George's chicken with pigs in blankets, and Abi's homemade sage and onion sausage meat balls. The second was Christmas day which I also ended up cooking as everyone else fell asleep. It was only the four of us, so we had a turkey crown without the legs and I made Abi's sausage meat balls as they were so delicious the first time!

Giving the girls some tips for carving the chicken, pretending I'm a domestic goddess when it always goes wrong at home. 


Couldn't keep them away from picking at the yummy bits left on the carving board. 


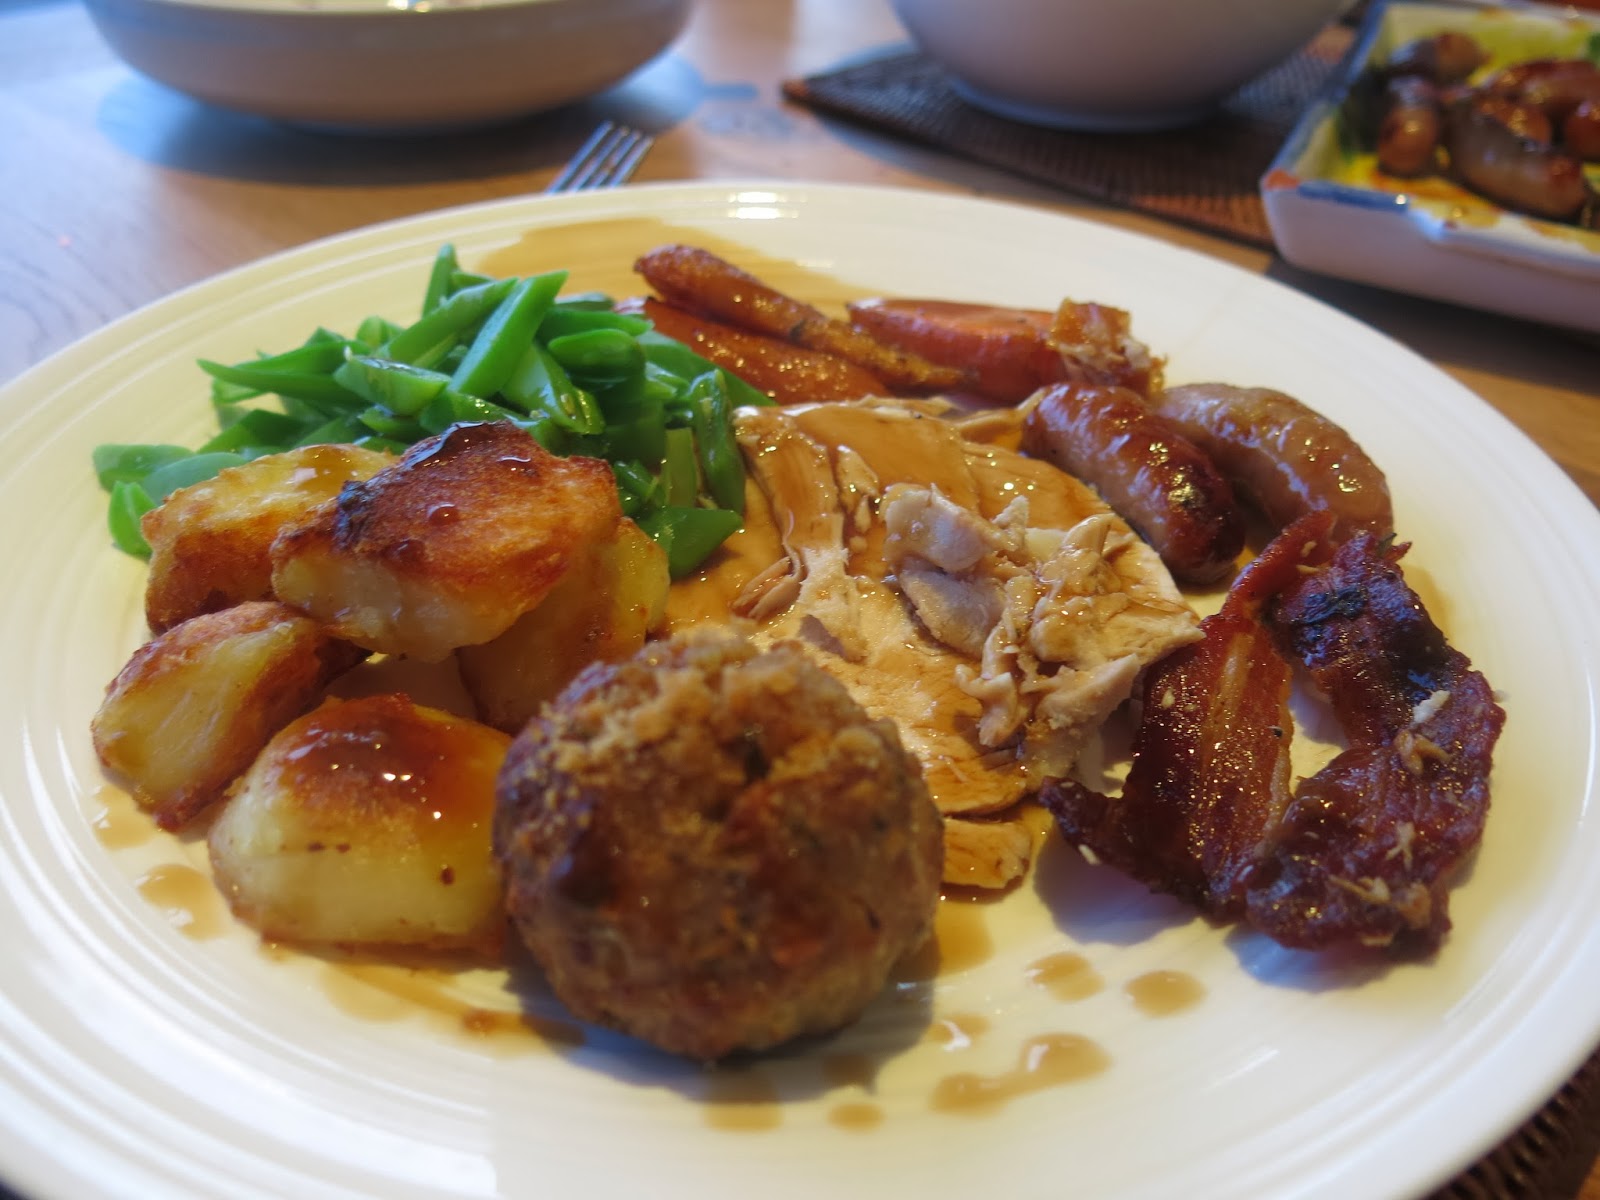
Our beautiful roast with all the trimmings was delicious.

At home, I put herbs and streaky bacon on the turkey crown. It looks more like a dinosaur, I got carried away, but it tasted delicious! I also put some water in the bottom of the pan while cooking so that the onion, garlic and carrots didn't burn. If the water evaporates you can always add more throughout the cooking. It helped me make a delicious gravy at the end too! 


These are the stuffing balls inspired by the ones my friend Abi made at the weekend. I added 500g of sausage meat to some finely chopped sage and onion and breadcrumbs. Instead of normal breadcrumbs I used croutons and bashed them with a rolling pin in a sandwich bag, mainly because it was all I could find in our cupboard, but I think it made making breadcrumbs extremely easy. Abi's top tip is to sprinkle the breadcrumbs on top for an extra crispy outside. Baked for 20-30 minutes. 


 I added some honey and thyme to some cocktail sausages because quite frankly by that point I was sick of looking at pigs in blankets. Baked for 20 minutes. 


Wishing you all a very happy new year, 
L x

Monday, 23 December 2013

Christmas Madness

Today has been such an overwhelming day, and I feel like I have to share it because I don't think anyone could ever imagine what can go on in a little high street butchers shop! Today and tomorrow are the two days that customers collect their orders for Christmas. For the 12 days previous all the butchers have worked without a single day off, starting at 6/7am and some days not coming home until 9pm in order to prepare and allocate every single meat order. I have no idea how they keep going, I am in awe of how physically hard they work.

7am. There were already a few customers avidly waiting for the doors to open. I started making pigs-in-blankets with Beth fresh for the counter. I am so happy we managed to make these as I know in previous years people have asked me, and we just haven't had the time or staff to do so! I know having a nose around the supermarkets it is hard to work out where the meat for this sort of product comes from so it's nice that we could give customers something that they know is 100% a Suffolk product.


10am. I started serving customers, running up and down stairs like a mad woman to collect turkeys and different meat joints ordered. I love serving at Christmas because there is such a buzz and love thinking about all the gorgeous meals people are going to cook for family and friends. Arthur who helps filling up the counter went and took these pictures of the queue and shop early afternoon, and as customers kept telling me, the length didn't change much throughout the day.


3am. Dad finally noticed I hadn't stopped all day so I ran to Crabtree's for a coffee and cake, but when the queue's like it is, and knowing how hard the boys have worked for two weeks it's impossible to stop any longer than it is needed to wolf down a slice of Victoria Sponge! Late afternoon Jock, who is now retired but was my Dad's first employee, came in to give us a tin of sweets. At this point I was so tired I thought I was going to get emotional... It sounds so stupid but when the shop was established 20 years ago (it's nearly as old as me!) it was half the size it was, their was only Dad and Jock working in it in a dead high street, and some years my Dad was so overworked and physically exhausted we had no family life at all... So to then see the endless queue in a buzzing high street and Christmas cards thanking the butchers for the service they contribute to the high street makes my heart swell with pride. Knowing how important the shop is to the community makes all those years of Andrew's hard work and sacrifice somehow worth it.

Saturday, 14 December 2013

Forerib of Beef with Roasted Potatoes and Carrots

Orders are coming in thick and fast for Christmas in the shop and what has really stood out is how much Forerib of Beef has been ordered this year. It really is a beautiful cut of beef, by far my favourite for roasting, so I thought that as so many of you will be cooking it this year I would show you how I like to cook it, and really how easy it is!


The Forerib has a really distinct flavour because it is left on the bone and has a nice coating of fat around the outside. I know a lot of people shy away from fat, but when it comes to meat, fat and bone really do equal flavour- the more the better. There is also a big difference between a healthy marbling of fat running through the meat and a coating round the outside, and then meat which is completely fatty and grisly. Luckily if you're shopping at a good quality butchers, you will get the former! Because the beef has a distinct flavour, I like to cook my roast potatoes and carrots in the pan so that they can cook in the meat juices for lots and lots of flavour. I then just serve with some fresh green beans so that the meal isn't too heavy.

Roasts are really easy to cook, because you have loads of time to spend on each individual component and don't need to be juggling a million things at once; so there is plenty of time to have a glass of wine and natter with friends in between things coming out and going in. All you have to worry about is your timings for which I work backwards. For example if I know when I want to eat, I know that I have to put the green beans on to boil ten minutes before the end, the carrots in the roasting tin 40 minutes before, and the potatoes in 55 minutes before the end. The gravy can be made at any point and kept warm on the hob. So so simple.

As for how long to cook the beef... For a medium roast- which really is best for beef, no one wants overcooked beef- cook for 20 minutes at 220C to really crisp up the fat on the outside. Then lower your oven to 160C and  cook for 45 minutes for every kilogram it weighs. For example for a 2KG piece,cook for 20 minutes at 220C and for 1 hour 30 minutes at 160C.

After roasting for twenty minutes I place the Forerib on 2 onions halved. This is because I like to cook the potatoes in a good couple of tablespoons of hot oil to get them really crispy... Placing the the beef on the onions just stops the oil running into the meat and making it greasy. Your oil will then be sizzling hot when you want to add your potatoes to the pan, and will really help to crisp them up. If the oil is too cold it will just seep into the potatoes instead of just sealing the outside.


While the oil is heating up and beef is cooking away, you need to peel, chop and par boil your potatoes. For slightly smaller roast potatoes than normal, which I prefer, bring to the boil in cold water. Then boil for 5-6 minutes. Drain away the water and, with the lid on the saucepan, shake well. This will make the potatoes really fluffy and eventually lovely and crispy. Keep the lid on the potatoes until you want to cook them, keeping them as warm as possible. You can also prepare the carrots at this stage. I don't so much par boil the carrots as to just let them sit in boiling water off the heat. This just softens them and helps them to roast all the way through.


When carrots, potatoes and beef are all roasting away nicely (you might want to add some fresh herbs in and around) you can concentrate on your gravy. First and foremost I have to admit I cheat and use Bisto Best (gluten free) as it is the easiest way to make sure you get a nice thick consistency... However  I always make sure I add my own flavours to make it taste that little bit more special.


So in a pan, sweat down some vegetables with flavour. I tend to use whatever is in the fridge, so here I used tomatoes, olives, mushroom and onion. However celery, carrot and garlic all work well. Then add a splash of water and a bigger splash of red wine and whack up the heat to get all those flavours working together. Adding a spoonful of redcurrant jelly or cranberry sauce also makes a big difference if you have any in. At this point make up your bisto gravy in a Pyrex measuring jug- 3 heaped spoons of powder to a pint of water- and add to the gravy. Lower the heat and let it do its thing until the dinner is done when you can just sieve into a gravy jug.

Then have a glass of wine from the bottle you've just opened and relax a bit, maybe giving the potatoes and carrots a little turn around. The final thing to do is to boil some green vegetables ten minutes before the end. You may want to time it that you take the beef out at this stage too and let it rest. Carving the beef is really easy. Just work your knife around the bone- the meat will be so tender that it really will just pull away from the meat. Then place the meat on its side, upwards, and take your time to carve slices onto a plate.

I hope everyone who has ordered Forerib this year really enjoys it! If you have any questions regarding cooking it please do email me lauren_rose1992@hotmail.co.uk and I will be happy to answer.




Thursday, 14 November 2013

Pork and Pak Choi Noodles

I am so excited to get the blog up and running again... I have had a crazy month and have missed cooking properly so much! I cook stir-fry a lot, as it is so quick and easy, but is usually made using whatever I have left in the fridge and not that healthy. For a change I thought I would use lots of veg and pack it full of Chinese flavour... I have used pork steaks as it is a leaner cut and is relatively cheap. It is also terribly easy to slice thinly for extra quick cooking- I think that really is the key to Chinese cooking, preparing everything and slicing thin for a super quick and easy meal. If you fancy something different, sliced rump steak would work really nicely with the oyster sauce.

 Ingredients

Pork Steaks (One each!) | The above veg made a big meal, but I just managed to polish it off, so adjust accordingly. Include bean sprouts, sliced pak choi, sliced red pepper, sliced mushroom and the "holy trinity" of Chinese cooking (as Gok Wan says!): sliced garlic, spring onion and ginger. | Oyster sauce | Soy sauce | 1 tbsp sesame oil | 1 tbsp sunflower oil | Medium egg noodles |

1. Prepare your vegetables. | 2. Slice your pork thinly and drizzle in soy sauce. | 3. Heat the sesame and sunflower oil in a pan and when hot fry the ginger and mushroom till slightly coloured. |

4. Add the rest of your vegetables, stirring regularly so nothing sticks to the bottom. | 5. Prepare your noodles by boiling in a pan to packet instructions. |


6. In a separate pan start frying your pork on a high heat. It will go a lovely golden brown and cook quickly. 

7. Add your drained noodles to the vegetables with a good dollop of oyster sauce. You want enough to give a lovely silky consistency, but not so much that it is all you can taste, you will be able to judge for yourself. 


 8. Serve your vegetable noodles onto hot plates and add pork pieces on top! If you like a little heat, I would add fresh chopped chilli when cooking the ginger and mushrooms.


Sunday, 13 October 2013

Sticky Sweet Chilli Chicken Wings

The thought of food excites me on the hour, but these... my god, you have to make them!! I knocked this recipe together because I didn't really have much food in, and had some sweet chilli sauce in the fridge. Chicken wings are also cheaper than chips, so this recipe makes for pure comfort food heaven without the usual guilt of spending money on a takeaway or not knowing where it has come from- I know mine has come from a happy farm in North Suffolk :) 

Ingredients 
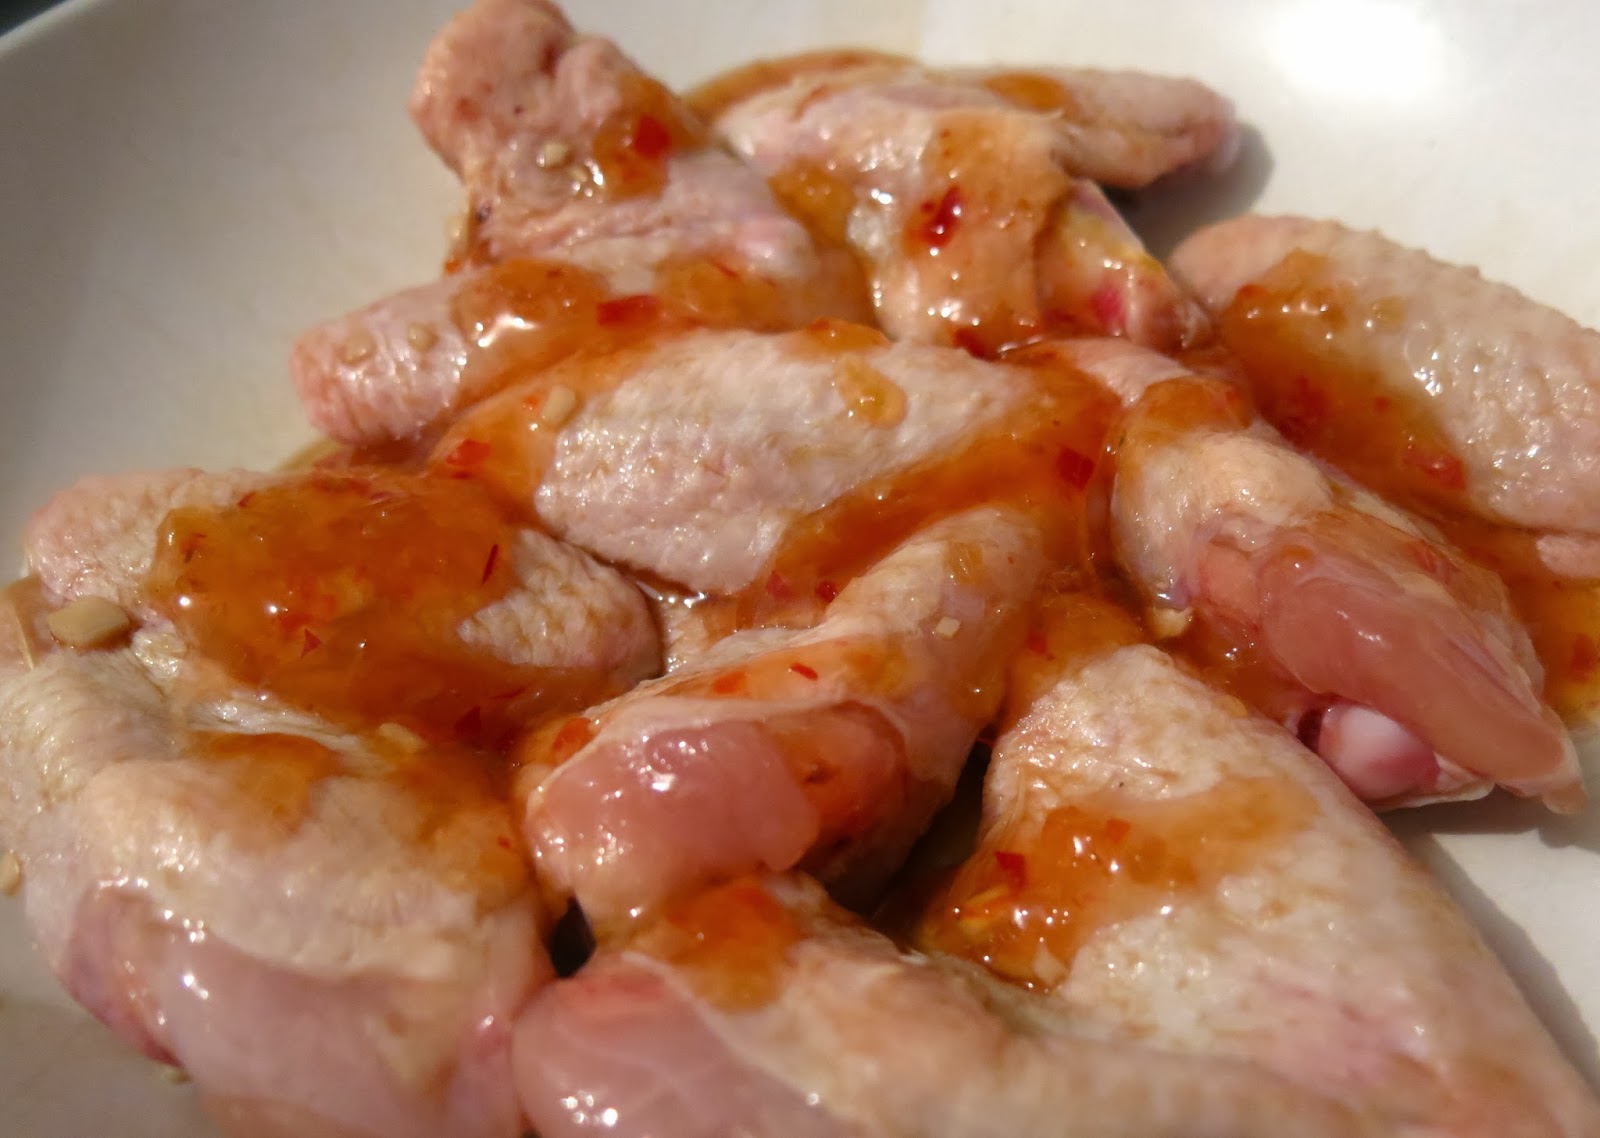
4 chicken wings per person (it was one of those days so I went for 6) | good shake of soy sauce | 1 clove of garlic finely, chopped | very generous shake/squeeze of sweet chilli sauce 

Preheat the oven to 180C | Pour over the garlic and soy sauce and massage into the chicken. | Wash hands, pour over enough sweet chilli sauce to cover the chicken and again massage in. | Always add more sauce if you think the chicken needs it.

Place the chicken on a foil lined baking tray and place in the oven for 30 minutes. Turn after 15 minutes, adding a drop of sauce to the other side. This leaves plenty of time to prepare an accompaniment such as noodles or rice. I just boiled some rice and added some fried onion and mushroom, adding soy sauce and rice wine for flavour. If you're feeling guilty you could always make a little noodle salad, but where's the fun in that?

Remove from the oven and eat immediately. Apart from a fork for the rice, chicken that tastes this good should only ever be eaten with fingers, so get stuck in! These wings are very sticky so back-up kitchen roll is probably a good idea.

I am writing this as I wait for my girlfriends to get ready for a night out and am seriously contemplating preparing these for when I get in later! Hope you enjoy them as much as I do...

L x

Tuesday, 1 October 2013

Ben's Beef Lasagne

Lasagne is one of my favourite meals but when it comes to cooking it, I have to admit I am pretty awful. My brother, however, is a dab hand so I thought I would take a few lessons from the man himself before we went back to uni. This meal is such perfect comfort food come summer or winter, and is a dish that is still delicious heated up the next day if you have any leftover... A perfect meal for my blog in my opinion!


Ingredients 

600g beef mince (for your own sake please buy fresh from a good butchers, anything else will leave your lasagne full of water and/or fat) | 1 pack of fresh lasagne sheets | 2 jars of tomato and basil pasta sauce | good handful of frozen sweetcorn (optional) | 1 garlic clove finely chopped | one pot of cheese sauce | cheddar to grate on top (try Andrew's Black Bomber or Mature Farmhouse Cheddar | 

Preheat the oven to 190C | Brown off the mince and chopped garlic in a large shallow frying pan on a high heat. 

If using add the sweetcorn and continue to cook at high heat, until any excess liquid is cooked off and mince is brown not grey. | Add your chosen tomato sauce, heat through and mix thoroughly.


Add a layer of mince to a large ovenproof dish. Cover with a thin layer of cheese sauce.  


Add enough sheets of lasagne to cover the mince and cheese sauce.

Repeat these last few steps... A layer of mince, layer of cheese sauce, pasta sheets... until you have used up all ingredients. On top of the final sheets of lasagne add the last bit of cheese sauce and grate cheddar over the top to cover.

Bake in the oven for 30- 35 minutes until golden brown on top. Serve with bread and oils and a salad.